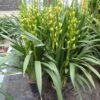
### Growing Sato Cymbidium Orchids from Seeds: A Comprehensive Guide
Sato Cymbidium orchids are known for their stunning flowers and unique characteristics. While these orchids can be propagated through various methods, growing them from seeds is a rewarding but complex process that offers several benefits, including genetic diversity and the potential for hybridization. This guide will take you through the essential steps, considerations, and techniques involved in cultivating Sato Cymbidium orchids from seeds, providing you with a solid foundation to embark on this exciting journey.
#### 1. Understanding Orchid Seed Propagation
Orchid seed propagation differs significantly from other types of plant propagation due to the unique characteristics of orchid seeds. Unlike many other plants, orchid seeds are extremely small and lack the necessary nutrients to support germination. This lack of nutrients means that orchid seeds need specific conditions to grow, making the propagation process a bit more complicated.
**Key Characteristics of Orchid Seeds:**
– **Size and Structure**: Orchid seeds are tiny, resembling dust particles, and are produced in large quantities. A single seed pod can contain thousands of seeds.
– **Nutrient Requirements**: Unlike seeds from most plants, orchid seeds do not have a food reserve (endosperm). They depend on a symbiotic relationship with mycorrhizal fungi for nutrients during their germination stage.
– **Germination Timeline**: The germination process can take several months to years, depending on the species and environmental conditions.
Understanding these unique characteristics is vital for anyone interested in propagating Sato Cymbidium orchids from seeds. This knowledge will help you create the optimal environment for successful seed germination and plant development.
#### 2. Collecting and Preparing Orchid Seeds
The first step in growing Sato Cymbidium orchids from seeds is to collect the seeds from mature flower pods. Here’s how to do it properly:
##### a. Identifying Seed Pods
After pollination, the Sato Cymbidium orchid will produce seed pods that mature over time. A seed pod typically changes color from green to yellow or brown when ready for harvest.
##### b. Harvesting Seeds
1. **Timing**: Wait until the seed pod has dried and turned brown before harvesting. This usually takes several months after pollination.
2. **Cutting the Pod**: Use sterilized scissors or a knife to carefully cut the seed pod from the plant.
3. **Extracting Seeds**: Open the seed pod and gently shake out the tiny seeds onto a clean, dry surface. Be careful not to damage the seeds during this process.
##### c. Storing Seeds
– **Container**: Place the collected seeds in a sterile, airtight container to protect them from moisture and contaminants.
– **Environment**: Store the container in a cool, dark place until you are ready to plant the seeds. Proper storage conditions can help maintain seed viability.
#### 3. Creating a Suitable Germination Environment
Once you have your Sato Cymbidium seeds ready, the next step is to prepare an optimal environment for germination. The conditions need to mimic the natural habitat of the orchids as closely as possible.
##### a. Preparing the Growth Medium
1. **Choosing the Right Medium**: Since orchid seeds require a nutrient-rich medium to germinate, a common choice is a mixture of agar, which is a gelatinous substance derived from seaweed, combined with orchid nutrient solutions. Alternatively, some growers use sterilized sphagnum moss or coconut coir.
2. **Adding Nutrients**: Incorporate orchid-specific nutrients, including potassium, nitrogen, and phosphorus, into the growth medium. This will provide the essential elements needed for seed development.
##### b. Sterilization
To prevent contamination from mold and bacteria, it’s crucial to sterilize your growth medium and any containers or tools you will use. This can be achieved through:
– **Boiling Water**: Boil the growth medium for 20-30 minutes and allow it to cool before use.
– **Pressure Cooking**: For more thorough sterilization, use a pressure cooker to sterilize the medium at 15 psi for 15-20 minutes.
##### c. Setting Up the Germination Chamber
1. **Humidity and Temperature**: Create a controlled environment with high humidity (around 70-90%) and a stable temperature (75°F to 80°F or 24°C to 27°C). This can be done by using a humidity dome or a mini greenhouse.
2. **Light Conditions**: While orchids need light for photosynthesis, direct sunlight can be too harsh for seeds. Provide bright, indirect light using fluorescent or LED grow lights, aiming for a 12-16 hour photoperiod.
#### 4. Sowing the Seeds
With the growth medium prepared and the environment set up, it’s time to sow the seeds. Follow these steps to ensure the best chances of success:
##### a. Sowing Techniques
1. **Distribution**: Sprinkle the seeds evenly over the surface of the sterile growth medium. Due to their tiny size, you may need to use a small brush or a pair of tweezers for precise placement.
2. **Covering Seeds**: Lightly mist the seeds with sterile water to help them adhere to the medium. Do not cover them with additional substrate, as they need exposure to light for germination.
##### b. Watering and Maintenance
– **Misting**: Use a fine mist spray bottle to maintain humidity without over-saturating the medium. This method helps prevent fungal growth while providing the moisture the seeds need.
– **Monitoring Conditions**: Regularly check the temperature and humidity levels within your germination chamber. Adjust the settings as necessary to maintain optimal conditions.
#### 5. Germination and Growth
The germination phase is a critical period in orchid cultivation. Here’s what to expect and how to care for the seeds during this time:
##### a. Germination Timeline
Germination can take anywhere from a few weeks to several months, depending on the specific conditions and the species. During this time, you should see tiny green shoots emerging from the growth medium, indicating successful germination.
##### b. Providing Nutrients
As the seedlings begin to grow, they will require nutrients to support their development:
1. **Adding Fungal Symbionts**: Introducing mycorrhizal fungi to the growth medium can significantly improve nutrient uptake. The fungi form a symbiotic relationship with the orchid seedlings, providing them with the necessary nutrients while receiving carbohydrates in return.
2. **Fertilization**: Once the seedlings develop a few true leaves, you can begin applying a diluted orchid fertilizer (at a quarter strength) every few weeks. This ensures the seedlings receive essential nutrients for healthy growth.
##### c. Transplanting Seedlings
As the seedlings grow and develop strong roots, they will eventually need to be transplanted into individual pots. This typically occurs when the seedlings reach about 2-3 inches in height and have a well-established root system.
1. **Choosing Pots**: Select pots with drainage holes and fill them with an appropriate orchid potting mix, which should include a blend of bark, perlite, and sphagnum moss for optimal aeration and drainage.
2. **Careful Handling**: When transplanting, handle the seedlings gently to avoid damaging the delicate roots. Make a small hole in the potting mix, place the seedling inside, and lightly firm the mix around the base of the plant.
3. **Acclimatization**: After transplanting, gradually acclimatize the seedlings to lower humidity levels and brighter light conditions. This process helps prevent shock as they adjust to their new environment.
#### 6. Long-Term Care for Sato Cymbidium Orchids
Once your Sato Cymbidium orchids are well established, ongoing care is essential to ensure they thrive and produce beautiful flowers. Here are some tips for long-term care:
##### a. Watering Practices
– **Frequency**: Water your orchids when the top inch of the potting medium feels dry. Overwatering can lead to root rot, so it’s important to monitor moisture levels closely.
– **Water Quality**: Use distilled or rainwater when possible, as tap water can contain chemicals that may harm the orchids.
##### b. Fertilization
– **Balanced Fertilizer**: Apply a balanced orchid fertilizer every 4-6 weeks during the growing season (spring and summer) to encourage healthy growth and blooming.
– **Adjusting Formulas**: Consider using a higher phosphorus fertilizer during the flowering period to promote robust blooms.
##### c. Light and Temperature Requirements
– **Light Levels**: Provide bright, indirect light for optimal growth. If leaves appear yellow, this may indicate too much light, while dark green leaves may suggest insufficient light.
– **Temperature Control**: Maintain a stable temperature with a slight drop at night to mimic natural conditions and encourage blooming.
##### d. Pest and Disease Management
– **Regular Inspections**: Regularly check your plants for signs of pests, such as aphids, mealybugs, or spider mites. Promptly treat infestations with organic insecticides or neem oil.
– **Fungal and Bacterial Diseases**: Monitor for signs of fungal or bacterial diseases, and ensure proper air circulation and drainage to prevent these issues.
#### 7. Conclusion
Growing Sato Cymbidium orchids from seeds is a complex yet rewarding endeavor that requires patience, attention to detail, and an understanding of the unique characteristics of orchids. By following the steps outlined in this guide—from seed collection and germination to long-term care—you can successfully cultivate these beautiful orchids and enjoy their stunning blooms for years to come.
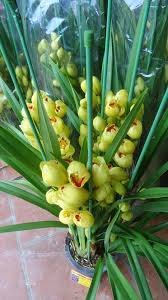
### Methods of Growing Sato Cymbidium Orchids from Seeds: A Detailed Exploration
Growing Sato Cymbidium orchids from seeds is an intricate and rewarding endeavor that allows enthusiasts to cultivate unique plants while appreciating the beauty of these remarkable orchids. This guide delves into the various methods, techniques, and considerations for successfully growing Sato Cymbidium orchids from seeds, covering everything from preparation to long-term care.
#### 1. Understanding the Propagation Process
Before embarking on the journey of seed propagation, it’s crucial to understand the lifecycle and growth requirements of Sato Cymbidium orchids. Unlike other plants, orchids have distinct characteristics that influence their propagation methods.
**Characteristics of Sato Cymbidium Seeds:**
– **Size and Composition**: Orchid seeds are incredibly small, lacking the nutrient reserves found in the seeds of other plants. This characteristic necessitates a reliance on a suitable growing medium that provides the nutrients required for germination.
– **Germination Requirements**: Successful germination requires a symbiotic relationship with mycorrhizal fungi, which assist the seeds in nutrient absorption during their early growth stages.
#### 2. Preparing for Seed Germination
To ensure a successful germination process, proper preparation is essential. This involves creating the right environment and utilizing suitable growing mediums.
##### a. Selecting the Right Medium
Choosing the appropriate growing medium is crucial for seed germination. A sterile, nutrient-rich medium provides the essential nutrients needed for seed development.
1. **Agar Medium**: One of the most common mediums for orchid seeds is agar, a gelatinous substance derived from seaweed. Agar can be mixed with specific nutrients to promote seed growth. This combination allows for a sterile environment and supports the delicate seeds during germination.
2. **Sphagnum Moss or Coconut Coir**: For those who prefer a more organic approach, sterilized sphagnum moss or coconut coir can be excellent choices. These materials retain moisture well and provide good aeration for developing roots.
##### b. Sterilization Process
Sterilizing the growing medium and containers is vital to prevent contamination from harmful fungi and bacteria.
1. **Boiling**: Boiling water can effectively sterilize the growing medium. Simply boil the chosen medium for 20-30 minutes, then allow it to cool before use.
2. **Pressure Cooking**: For thorough sterilization, especially in larger quantities, a pressure cooker can be employed. Sterilize the medium at 15 psi for 15-20 minutes to eliminate any potential contaminants.
#### 3. Setting Up the Germination Environment
Creating a controlled environment that mimics the natural conditions of Sato Cymbidium orchids is critical for successful germination.
##### a. Temperature and Humidity Control
Orchid seeds thrive in high humidity and stable temperatures. Setting up a germination chamber can help maintain these conditions.
1. **Humidity Dome or Mini Greenhouse**: Utilizing a humidity dome or mini greenhouse can help retain moisture and create a warm, humid environment suitable for seed germination. Ensure the chamber is well-ventilated to prevent mold growth.
2. **Temperature Regulation**: Aim to maintain a temperature between 75°F to 80°F (24°C to 27°C). Consider using a seedling heat mat to provide consistent warmth.
##### b. Light Conditions
While orchid seeds require light for photosynthesis, direct sunlight can be detrimental. Providing bright, indirect light is ideal.
1. **Grow Lights**: Using fluorescent or LED grow lights can help provide the necessary light levels without overwhelming the delicate seeds. Aim for a photoperiod of 12-16 hours daily to encourage healthy growth.
#### 4. Sowing the Seeds
With the medium prepared and the environment set, it’s time to sow the seeds.
##### a. Sowing Techniques
1. **Distribution**: Evenly sprinkle the seeds over the surface of the sterile growing medium. Given their small size, a small brush or tweezers may be helpful for precise placement.
2. **Misting**: Lightly mist the seeds with sterile water to encourage them to adhere to the medium without covering them. This allows the seeds to receive light while remaining moist.
#### 5. Caring for Germinating Seeds
After sowing, the focus shifts to maintaining optimal conditions for seed germination.
##### a. Monitoring Moisture Levels
– **Regular Misting**: Use a fine mist spray bottle to maintain humidity levels. Avoid over-saturating the medium, as excessive moisture can lead to fungal growth.
– **Humidity Control**: Continuously monitor humidity levels inside the germination chamber. Ideal humidity levels should be between 70-90%.
##### b. Observing Germination Progress
Germination can take anywhere from a few weeks to several months, depending on environmental conditions. During this period, keep a close eye on the seeds for signs of growth.
1. **Identifying Germination**: Look for tiny green shoots emerging from the medium, indicating successful germination. Patience is key, as the process can be slow.
#### 6. Introducing Mycorrhizal Fungi
One of the most crucial aspects of successful orchid seed germination is the introduction of mycorrhizal fungi. These fungi establish a symbiotic relationship with the seeds, facilitating nutrient uptake.
##### a. Selecting the Right Fungi
Choose a suitable mycorrhizal fungus species compatible with Sato Cymbidium orchids. Many orchid-specific fungal inoculants are commercially available and can be introduced into the growing medium.
##### b. Applying the Fungi
1. **Inoculation Process**: Once seeds have begun to germinate, gently mix the mycorrhizal fungi into the growing medium around the roots. This allows the fungi to establish a network that supports the growing seedlings.
2. **Monitoring Fungal Growth**: Over time, monitor the development of the fungi, as a healthy mycorrhizal population is essential for the ongoing health of the seedlings.
#### 7. Transplanting Seedlings
As the seedlings grow, they will eventually need to be transplanted into individual pots. This process usually occurs when the seedlings reach 2-3 inches in height and have a robust root system.
##### a. Choosing the Right Pots
Select pots with drainage holes and a suitable orchid potting mix that allows for proper aeration and drainage. A mix of bark, perlite, and sphagnum moss is ideal for Sato Cymbidium orchids.
##### b. Transplanting Process
1. **Careful Handling**: When transplanting, handle the seedlings gently to avoid damaging their delicate roots.
2. **Creating a Planting Hole**: Make a small hole in the potting mix, place the seedling inside, and lightly firm the mix around the base of the plant to provide support.
3. **Acclimatization**: Gradually acclimate the seedlings to lower humidity levels and brighter light conditions over a week to help prevent shock.
#### 8. Long-Term Care for Sato Cymbidium Orchids
Once your Sato Cymbidium orchids are established, ongoing care is vital to ensure their health and blooming potential.
##### a. Watering Practices
1. **Frequency**: Water the orchids when the top inch of the potting medium feels dry. This method helps prevent overwatering, which can lead to root rot.
2. **Water Quality**: Use distilled or rainwater whenever possible, as tap water can contain chemicals that may harm orchids.
##### b. Fertilization Techniques
1. **Balanced Fertilizer**: Apply a balanced orchid fertilizer every 4-6 weeks during the growing season (spring and summer) to support healthy growth.
2. **Adjusting Fertilizer Ratios**: During the flowering period, consider switching to a fertilizer with higher phosphorus content to promote robust blooms.
##### c. Light and Temperature Management
1. **Optimal Light Levels**: Provide bright, indirect light for optimal growth. If leaves appear yellow, it may indicate excessive light, while dark green leaves could signify insufficient light.
2. **Temperature Control**: Maintain a stable temperature, allowing for a slight drop at night to mimic natural conditions and encourage blooming.
#### 9. Pest and Disease Prevention
Regular monitoring for pests and diseases is crucial in maintaining the health of your Sato Cymbidium orchids.
##### a. Pest Management
1. **Regular Inspections**: Check the plants for signs of pests such as aphids, mealybugs, or spider mites. Early detection is key to effective treatment.
2. **Treatment Options**: Employ organic insecticides or neem oil to treat infestations promptly, ensuring minimal impact on the orchids.
##### b. Disease Prevention
1. **Fungal and Bacterial Diseases**: Monitor for signs of diseases and ensure proper air circulation and drainage to prevent these issues.
2. **Healthy Practices**: Avoid overhead watering, which can promote fungal growth, and ensure that pots have adequate drainage.
#### 10. Conclusion
Growing Sato Cymbidium orchids from seeds is a fulfilling journey that allows orchid enthusiasts to appreciate the intricacies of these beautiful plants. By understanding the unique characteristics of Sato Cymbidium seeds, preparing the appropriate growing environment, and following the methods outlined in this guide, you can successfully cultivate these stunning orchids.
With dedication and attention to detail, you’ll be rewarded with beautiful blooms and the satisfaction of having nurtured your orchids from seed to flowering plant. Whether you are a seasoned gardener or a novice, the methods discussed will provide you with the tools necessary to thrive in the art of orchid propagation. Happy growing!